Complete Guide for Ultrasonic Sensor HC-SR04 with Arduino
This post is all about the Ultrasonic Sensor HC – SR04. I’ll explain how it works, show some features and share an Arduino Project example to help you with your projects. We provide a schematic diagram on how to wire the ultrasonic sensor, and an example sketch to use with your Arduino.
Description
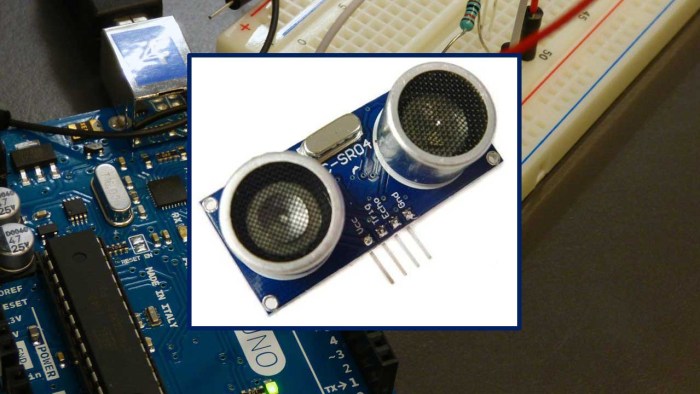
The HC-SR04 ultrasonic sensor uses sonar to determine distance to an object like bats do. It offers excellent non-contact range detection with high accuracy and stable readings in an easy-to-use package. From 2cm to 400 cm or 1” to 13 feet. Its operation is not affected by sunlight or black material like sharp rangefinders are (although acoustically soft materials like cloth can be difficult to detect). It comes complete with ultrasonic transmitter and receiver module.
Features
- Power Supply :+5V DC
- Quiescent Current : <2mA
- Working Current: 15mA
- Effectual Angle: <15°
- Ranging Distance : 2cm – 400 cm/1″ – 13ft
- Resolution : 0.3 cm
- Measuring Angle: 30 degree
- Trigger Input Pulse width: 10uS
- Dimension: 45mm x 20mm x 15mm
How Does it Work?
The ultrasonic sensor uses sonar to determine the distance to an object. Here’s what happens:
- the transmitter (trig pin) sends a signal: a high-frequency sound
- when the signal finds an object, it is reflected and
- the transmitter (echo pin) receives it.

RECOMMENDED: Read our Home Automation using ESP8266 Course
The time between the transmission and reception of the signal allows us to know the distance to an object. This is possible because we know the sound’s velocity in the air.
Sensor
 Pins
Pins- VCC: +5VDC
- Trig : Trigger (INPUT)
- Echo: Echo (OUTPUT)
- GND: GND
Where to buy?
You can check the Ultrasonic Sensor HC-SR04 sensor on Maker Advisor and find the best price.

Arduino with HC – SR04 Sensor
This sensor is really cool and popular among the Arduino tinkerers. So, here we provide an example on how to use the HC-SR04 ultrasonic sensor with the Arduino. In this project the ultrasonic sensor reads and writes the distance to an object in the serial monitor.
The goal of this project is to help you understand how this sensor works. Then, you can use this example in your own projects.
DOWNLOAD FREE PDF: Arduino eBook with 18+ Projects
Note: There’s an Arduino library called NewPing that can make your life easier when using this sensor.
Parts Required
You can use the preceding links or go directly to MakerAdvisor.com/tools to find all the parts for your projects at the best price!

Schematics
Follow the next schematic diagram to wire the HC-SR04 ultrasonic sensor to the Arduino.

The following table shows the connections you need to make:
| Ultrasonic Sensor HC-SR04 | Arduino |
| VCC | 5V |
| Trig | Pin 11 |
| Echo | Pin 12 |
| GND | GND |
Source code
Upload the following code to your Arduino IDE.
/*
 * created by Rui Santos, http://randomnerdtutorials.com
 *
 * Complete Guide for Ultrasonic Sensor HC-SR04
 *
    Ultrasonic sensor Pins:
        VCC: +5VDC
        Trig : Trigger (INPUT) - Pin11
        Echo: Echo (OUTPUT) - Pin 12
        GND: GND
 */
 int trigPin = 11;    //Trig - green Jumper
int echoPin = 12;    //Echo - yellow Jumper
long duration, cm, inches;
 void setup() {
  //Serial Port begin
  Serial.begin (9600);
  //Define inputs and outputs
  pinMode(trigPin, OUTPUT);
  pinMode(echoPin, INPUT);
}
 void loop()
{


  // The sensor is triggered by a HIGH pulse of 10 or more microseconds.
  // Give a short LOW pulse beforehand to ensure a clean HIGH pulse:
  digitalWrite(trigPin, LOW);
  delayMicroseconds(5);
  digitalWrite(trigPin, HIGH);
  delayMicroseconds(10);
  digitalWrite(trigPin, LOW);

  // Read the signal from the sensor: a HIGH pulse whose
  // duration is the time (in microseconds) from the sending
  // of the ping to the reception of its echo off of an object.
  pinMode(echoPin, INPUT);
  duration = pulseIn(echoPin, HIGH);

  // convert the time into a distance
  cm = (duration/2) / 29.1;
  inches = (duration/2) / 74;

  Serial.print(inches);
  Serial.print("in, ");
  Serial.print(cm);
  Serial.print("cm");
  Serial.println();

  delay(250);
}
Source code with NewPing
You can also use the the NewPing library. Download the library here.
After installing the NewPin library, you can upload the code provided below.
/*
 * Posted on http://randomnerdtutorials.com
 * created by http://playground.arduino.cc/Code/NewPing
*/
#include <NewPing.h>
 #define TRIGGER_PIN 11
#define ECHO_PIN 12
#define MAX_DISTANCE 200
 NewPing sonar(TRIGGER_PIN, ECHO_PIN, MAX_DISTANCE); // NewPing setup of pins and maximum distance.
 void setup() {
   Serial.begin(9600);
}
 void loop() {
   delay(50);
   unsigned int uS = sonar.ping_cm();
   Serial.print(uS);
   Serial.println(“cm”);
}
Troubleshooting
NOTE: “If the HC-SR04 does not receive an echo then the output never goes low. Devantec and Parallax sensors time out after 36ms and I think 28ms respectively. If you use Pulsin as above then with no return echo the program will hang for 1 second which is the default timeout for Pulsin. You need to use the timeout parameter.
http://arduino.cc/en/Reference/PulseIn
The HC-SR04 barely works to 10 feet giving a total path length of 20 feet and a path time of about 20ms so set the timeout to something above that, say 25 or 30ms.
The HC-SR04 barely works to 10 feet giving a total path length of 20 feet and a path time of about 20ms so set the timeout to something above that, say 25 or 30ms.
If you put a resistor, say 2k2 between E and T then only connect to T you can use the HC-SR04 from just one Arduino pin. Look up single pin operation of ultrasonic sensors.
Also if you are using a HC-SR04 with a PicAxe you need to up the clockspeed to at least 8MHz otherwise they don’t see the start of the echo pulse so pulsin never starts. The HC-SR04 works fine with a BS2.” by David Buckley
Thanks to my friend David to leave such an helpful comment!
Wrapping Up
In this post we’ve shown you how the HC-SR04 ultrasonic sensor works, and how you can use it with Arduino. If you are a beginner to the Arduino, we recommend following our Arduino Mini Course that will help you quickly getting started with this amazing board.
If you like Arduino, you may also like:
- Arduino Step-by-step Projects course
- Guide to SD card module with Arduino
- Guide to DHT11/DHT22 Humidity and Temperature Sensor With Arduino
- Guide for TCS230/TCS3200 Color Sensor with Arduino
You can find all our Arduino projects and tutorials here.


沒有留言:
張貼留言